


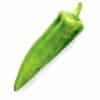
Brussels sprouts are an annual cool season crop, hardy to frosts and light freezes. There are two basic varieties: (1) the dwarf (“Jade Cross”) which matures early and is winter hardy, but more difficult to harvest and (2) the taller (“Long Island Improved”), which is less hardy but easier to harvest. Brussels sprouts have shallow roots, so as they become top heavy, you may need to stake them, particularly if exposed to strong winds. As with other brassicas, Brussels Sprouts are susceptible to pests and diseases that must be kept under control early in the season. As with other brassicas, composting roots should be avoided. Brussels Sprouts should not be grown within a 10 foot radius of any brassica growing location within the last 3 years, preferably 7 years. Brussels Sprouts are high in calcium and iron, as well as a good source of vitamins A and C.
Microgreens growing instructions: this is not the only way to do microgreens, everyone will acquire their own techniques, but here are the basics:
Cover the bottom of the container with an inch or two of moistened potting soil/mix or coir. Flatten and level it with your hand or a small piece of cardboard, taking care not to over-compress the soil.
Scatter seeds evenly on top of the soil. Press gently into the soil using your hand or the cardboard.
Cover the seeds with a thin layer of soil. Dampen the surface with a mister. If you prefer, you can skip this step and instead cover the container with a clear lid or plastic wrap until the seeds are sprouted.
While waiting for sprouts to appear, usually within three to seven days, use the mister once or twice daily to keep the soil moist but not wet.
Once seeds have sprouted, remove the cover (if you’ve used one) and continue to mist once or twice a day.
Microgreens need about four hours daily of direct sunlight to thrive. In winter months, some may need even more. Leggy, pale greens are a sign of not enough sunlight. Light needs can also be satisfied with a grow light that has a low heat output — you don’t want to scorch your delicate greens.
Microgreens will be ready to harvest about two to three weeks after planting. Look for the first set of “true leaves” as a sign of readiness. Then grab your scissors and snip the greens just above the soil line.
To serve, wash the microgreens with water and dry with paper towels or a salad spinner. Harvest and serve them immediately for the freshest flavor, and add to soups, salads, sandwiches or main dishes. Store remaining cut microgreens in a plastic bag in your refrigerator.
Zellajake Farm and Garden: “Seeds for all your planting needs” since 2013


Liam (verified owner) –
This is my 3rd purchase from this seller and they have not failed me yet. These trees are really nice and natural looking
Matthew (verified owner) –
Very fast delivery.
Kayden (verified owner) –
Very well worth the money.
Dominic (verified owner) –
Very fast delivery.
Julian (verified owner) –
The product is firmly packed.
Richard (verified owner) –
Looks great! My home is decorated in a Conservatory theme, but I do not have the lighting to grow a huge beautiful tree like this indoors
Ryan (verified owner) –
Awesome product and company
Patrick (verified owner) –
I would absolutely recommend this seed to anyone looking to grow veggies this year. I decided to do starts this year and just three days after planting
William (verified owner) –
So far so good!
Jackson (verified owner) –
It came really quick and looks real enough. I recommend!