


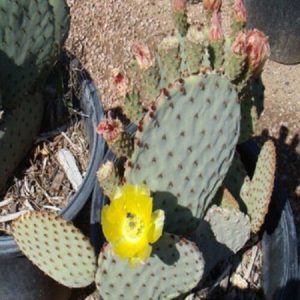
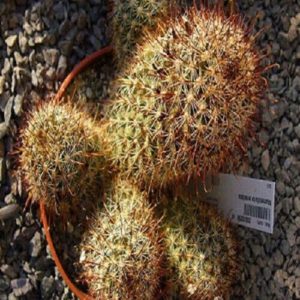


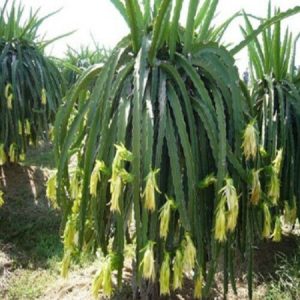


How To Grow A Cactus From Seed
Growing your
cactus indoors is the best way to grow your cactus. Indoors you have a more
controlled environment meaning they are more likely to germinate fast! Anywhere
between 3-8 months, compared to the years they would take to germinate outside.
Outside cacti will have to wait for the proper temperature and moisture for
them to grow. Little cactus seedlings need the best care and protection. The
sun will be their enemy for the first few years (until they are about 3 inches
long). This is way having them indoors in a shaded area is the best way to aid
these guys in germination. When they are roughly an inch long this is when you
should slowly start introducing sun. Increase the light intensity slowly but if
they start to scorch keep it off! After time goes on, you’ll be able to leave
them in the light consistently with no issues, then that’s the time to take
them outdoors!
Steps for
growing:
SOIL: Cactus seedlings are MASSIVLY
intolerant to poorly draining soil. Common cactus problems such as bacteria and
molds are the main things you need to protect your seedlings from. This means
you need to sterilize the soil.
To sterilize
the soil, you can bake or microwave the soil mix you are going to use.
·
Using a Microwave
When using
the microwave for sterilization, fill a microwave-safe container with moist
soil and cover with a lid (DO NOT USE FOIL). Add vent holes on the lid
to prevent any pressure build up. Heat the soil for 90 seconds, leave the soil
to cool by covering the vent holes with tape.
·
Using an Oven
When using
an oven for sterilization you will need an oven specific container. Put soil
about 4 inches deep into the container you are using and cover with foil. Using
a thermometer, place in the center and heat your oven to 180F for 30 minutes.
After 30 minutes remove and let the soil cool. DO NOT remove the foil
until you are ready to use your soil.
For the
perfect soil you will need:
·
Pumice
or granite stone
·
Cactus
soil
The base of
your soil mix should be pumice stone and cactus soil. Before using the cactus
soil remove all chunks or clumps from the soil. These clumps are breeding
grounds for bacteria and block water from draining well. After you sift the
cactus soil mix with the pumice or granite stone. You can also use limestone
screening (also cheaper option). Make sure the pumice is more than the soil by
about 10%. Pour the mix where you intend to plant your seeds but do not pack it
in. Let the soil stay as natural as possible. Since cactus seeds are very small
a 2-inch pot is more than sufficient. Note that if you are reusing any pots
that those need to be thoroughly cleaned and sterilized. The seeds severely
need a high-drainage soil. Make sure to moisten your soil but make sure that
the water drains completely. Spread your cactus seeds on the top of the soil
but DO NOT force them into the soil. You can cover the seeds with a very
thin layer of sand or cactus soil, BUT keep in mind that the seeds only have a
tiny amount of stored energy which may not reach deep in the soil before
running out. Therefor just don’t bury your seeds.
SUN: After you moisten, plant, and cover
your seeds with sand, you need to cover them in a transparent lid or plastic
wrap. Place your seeds indoors where they are access to the correct amount of
sun. Consider placing them on a sunny windowsill. DO NOT place them
outside in bright intense sunlight. The purpose of the transparent lid is to
retain moisture and allow light to reach the plant. Monitor your seedlings
carefully and daily. If you see them starting to turn purple or red, they could
possibly be getting sunburned. If so, just reduce the amount of light access.
During germination, the seeds need heat as much as they need sun. warm areas of
the house are ideal; however, you can also purchase a heating mat that you can
place under your tray or pots to boost germination.
Germination
stages: Cacti grow
slowly, so you do need some patience with these guys. After planting with the
right light and temperature you should see your seedlings beginning to
germinate. This realistically could take a month or more. Tiny spines start to
form in the first stage. Once you see these spines this is your cue to the
plant breath away from the plastic wrap or lid. Please do this step gradually,
leave the top open for a few hours during the day and then gradually increase
the time in which you have it open until the cactus doesn’t need it anymore.
When you do get to the point where the lid/wrap are fully off water will
evaporate at a much faster rate meaning you will need to be on top of watering them,
so they do not die. PLEASE use fresh or distilled water on your cacti to
avoid bacteria and algae growth. If your tap water tastes like chlorine DO
NOT use this on your cacti. The roots are tender and using water with
chlorine in it will burn the roots, ultimately killing your plants. DO NOT
overwater your seedlings. There should be no standing water in your container.
You can also sip your finder in the soil to see how dry or wet it is. Cacti
roots are extremely tender until they are grown. Keep your seedlings in the
plastic wrap until they overgrow. High humidity is what give nutrients and
water absorption in the roots until they are strong and healthy enough. When
germination occurs, keep up your waterings. Look out for seedling thinning,
which means they aren’t getting enough light. Algae on the top of the soil is a
sign of overwatering, and a fungus infected cacti will start to have black
spots.
Repotting: When the seeds are overgrown it is
time to repot. Choose your pot wisely as you need one that drains quickly to
avoid root rot. Make sure your pot has drainage holes. Even with the right pot,
how much you water the cactus also contributes to whether your plant gets root
rot or not. Naturally, as cactus are slow growing, they can take up to a year
to reach the size of a marble. At this point you will need to repot again to
give the roots more room to grow and thrive, thus making your cactus grow
bigger as well. Enjoy growing your Cactus, and BE PATIENT!
Store Policies
All seeds will come in a resalable
plastic zip lock bag wrapped in a protectant so the seeds are not damaged by
shipping machines. All seed packets contain no fillers or other weeds or seeds
mixed in. Most have been harvested by hand & all test at a high germination
rate.
Seed Count
All seed counts should be considered estimates as the seeds is
packaged by hand, there is 2-3 more or less in a bag. We do our best to
ensure accuracy and will often add extra seeds. However, all estimates are
final.
Shipping
Seeds will ship without tracking numbers. Items
will be shipped 1-3 business days of receiving payment. Plants will be shipped
via USPS. Shipping usually takes anywhere from 3-5 days.
Feedback
If you do not satisfy with the purchase, please do not leave
negative/neutral feedback. Contact us for solution, We’ll try our best to
fix the problem as soon as possible.
Important, Please read
All seeds have been test sown to ensure germination.
Please familiarize yourself with growing conditions and instructions for your
seeds before you plant them, as all seeds are different. Basic growing
instructions can be found under each listing.
We Cannot Guarantee how much you will be able
to grow, as too many variables come into play, soil condition, your ability to
garden, weather etc. I guarantee that they arrive as described and are in good
viable condition and the germination rates are accurate.


Hayden (verified owner) –
The seeds had a great germination rate
Kai (verified owner) –
So far so good!
Robert (verified owner) –
These seeds came right up and started producing squash. Can’t ask for more than that.
John (verified owner) –
They arrived very fresh and not bruised. They were delicious.
Alan (verified owner) –
The product is firmly packed.